eSIM
Set up and manage your eSIM (dual SIM) to use one number for personal and one number for work or for travel.
In this tutorial, you will learn how to:
• Set up eSIM
• Manage cellular plans
• Switch cellular plan for phone call
• Switch cellular plan for message
• Erase eSIM
If you are trying to find your EID for your associated eSIM, view the Find IMEI & Serial number tutorial.
Set up eSIM
1. From the home screen, swipe down from the Notification bar with two fingers, then select the ![]() Settings icon.
Settings icon.
2. Select Network and internet, then select SIMs.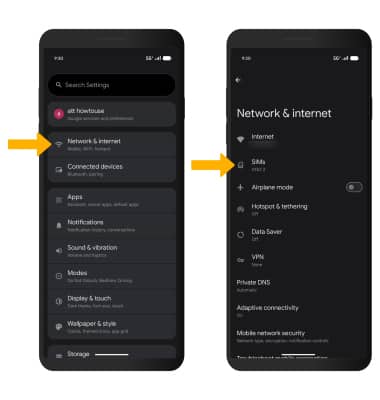
3. Select Add SIM.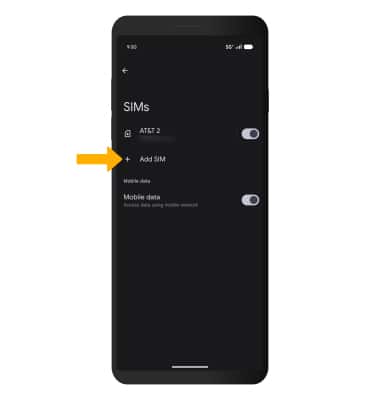
4. Select Set up an eSIM, then select the desired network.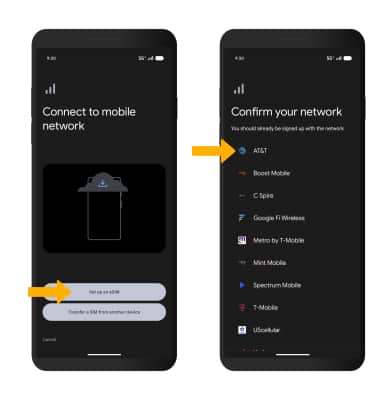
5. Select Set up to activate your AT&T number. Your eSIM may take a few minutes to activate.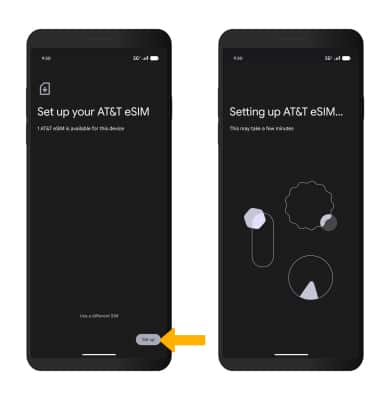
6. Your AT&T number is now active and ready for use. Select Settings and follow the prompts to finish setting up your new eSIM.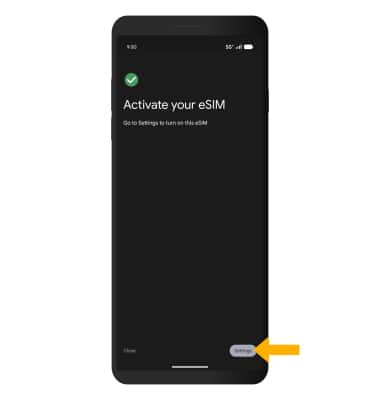
Manage cellular plans
1. To switch between cellular plans, from the SIMs screen, select the switch next to the SIM not currently being used for data. Select Get Started.
Note: Both of your phone numbers can make and receive voice calls and send and receive messages. However, your phone can only use one cellular data network at a time.
2. If you wish to edit your SIM's label, select the desired SIM. Select Next. Edit default SIM settings as desired, then select Done.
Note: SIM settings can be edited from the SIM screen at any time.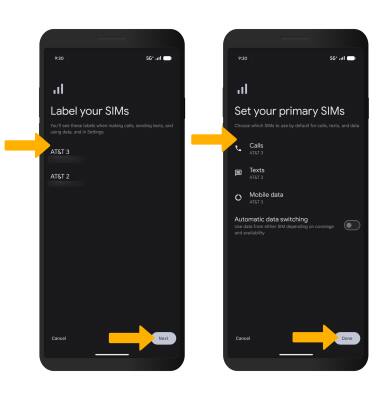
Switch cellular plan for phone call
1. From the home screen, select the ![]() Phone app.
Phone app.
2. Select the ![]() Menu icon, then select Settings. Select Calling accounts.
Menu icon, then select Settings. Select Calling accounts. 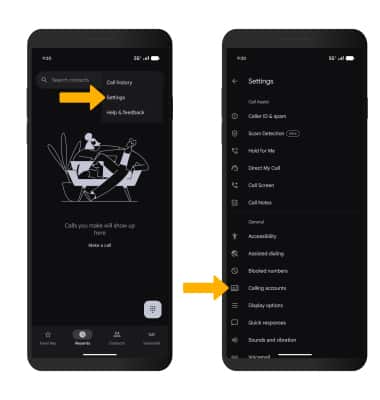
3. Select Make calls with, then select the desired option.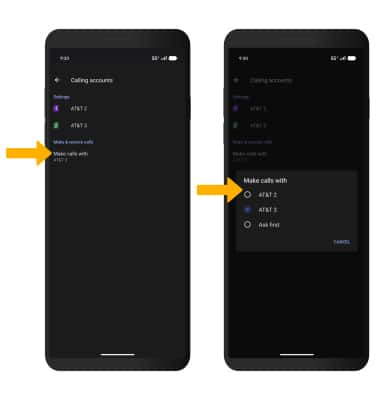
Switch cellular plan for message
From a message thread in the Messages app, select the current SIM in use. Select Switch, then select the desired SIM you wish to send messages with.
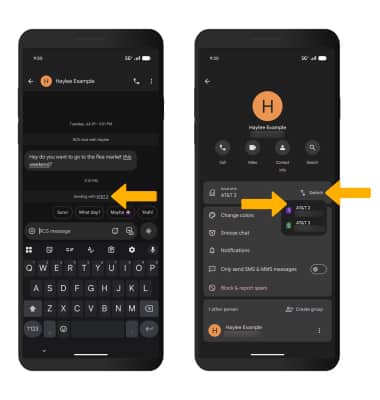
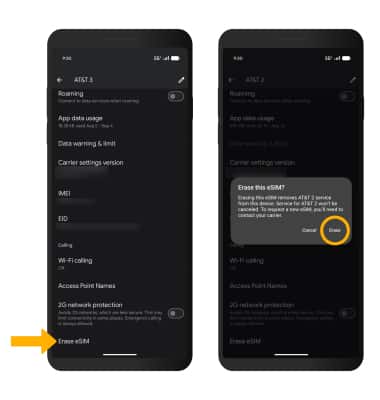
Erase eSIM
1. From the SIMs screen, select the desired eSIM. 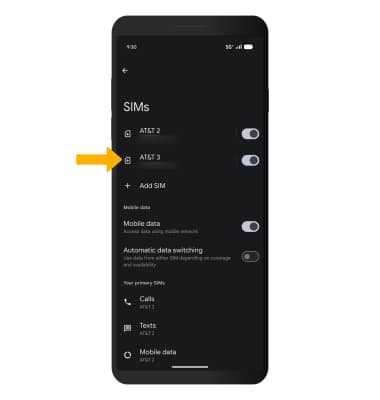
2. Scroll to and select Erase SIM. Select Erase to confirm.
Note: For more information, visit Using Dual SIM with an eSIM.