USB Tethering
USB Tethering
USB tether your device with your computer when there is too much Wi-Fi interference to connect wirelessly.
In this tutorial, you will learn how to:
• Adjust tethering settings
• Turn off Wi-Fi when tethering
• Adjust USB port settings
• Turn USB tethering on or off from device
Insert the USB-C end of the USB-C cable into the USB-C port at the base of the device. Insert the USB end of the USB-C cable in the USB port on the computer.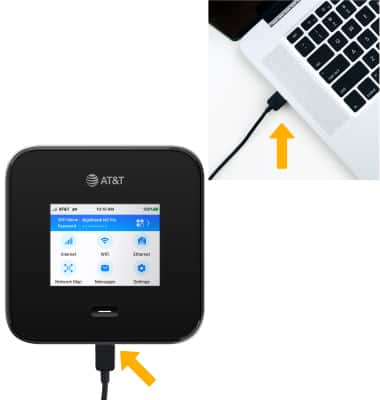
Adjust tethering settings
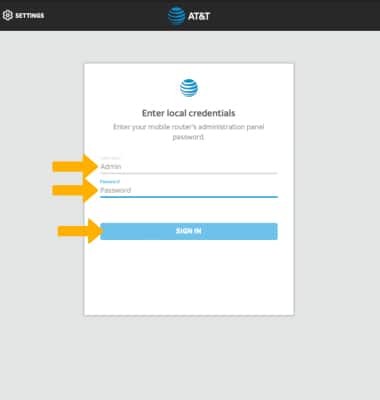
1. From your device's web browser, go to http://attwifimanager or type 192.168.1.1 into the search bar. Enter your Username and Password, then select SIGN IN.
Note: Ensure that your device is connected to the Netgear Nighthawk M6 Wi-Fi network. For more information, please see the Connect Devices to Wi-Fi or Connect PC or Mac to Wi-Fi tutorials.
2. Select SETTINGS at the top of the page.

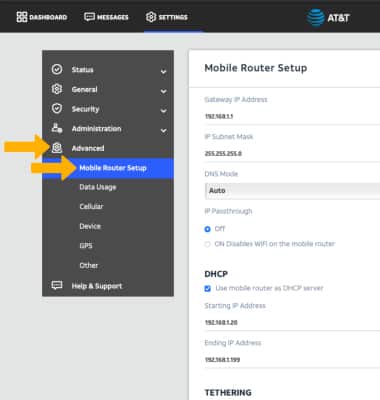
3. Select Advanced, then select Mobile Router Setup.

Turn off Wi-Fi when tethering
Select the Turn off WiFi when tethering checkbox.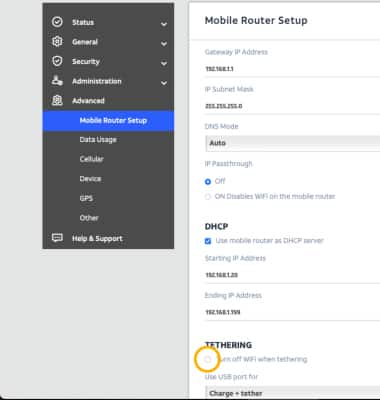
Adjust USB port settings
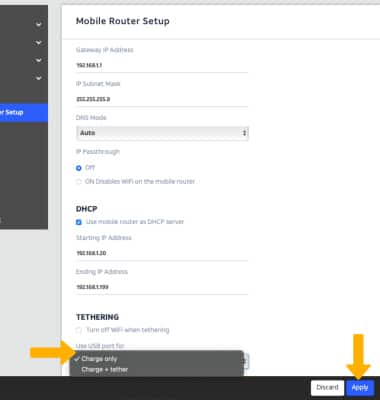
From the Mobile Router Setup screen, select the Use USB port for drop-down menu then select the desired option. Select Apply to save changes.
Note: Click Continue. The device will restart.
Turn USB tethering on or off from device
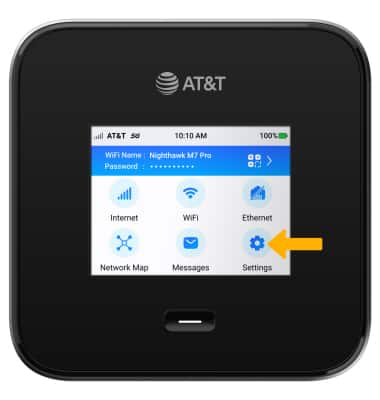
1. From the device home screen, select Settings.

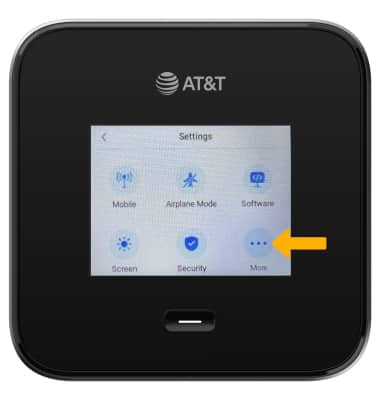
2. Select More.
3. Select USB Tethering.
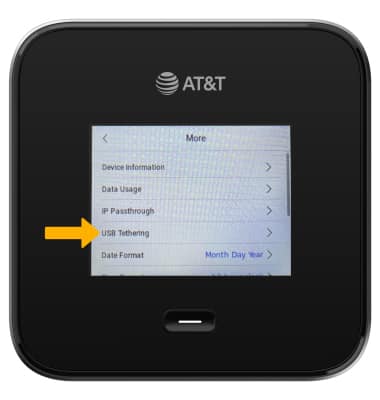
4. Select the USB Tethering switch to turn USB Tethering on or off.
Note: Select Continue. The device will restart.
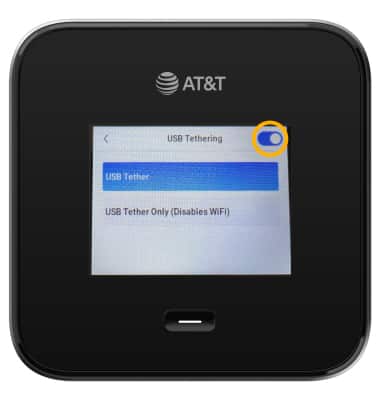
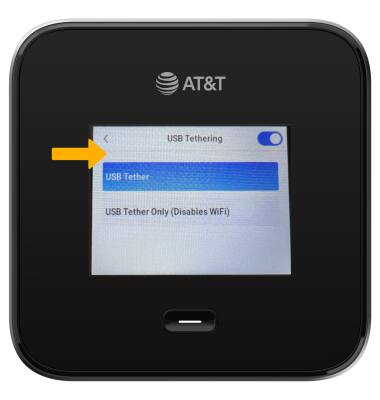
5. Select the desired USB Tethering option.
Note: Select Ok to confirm.
